Installing Under Cabinet Lighting at Home
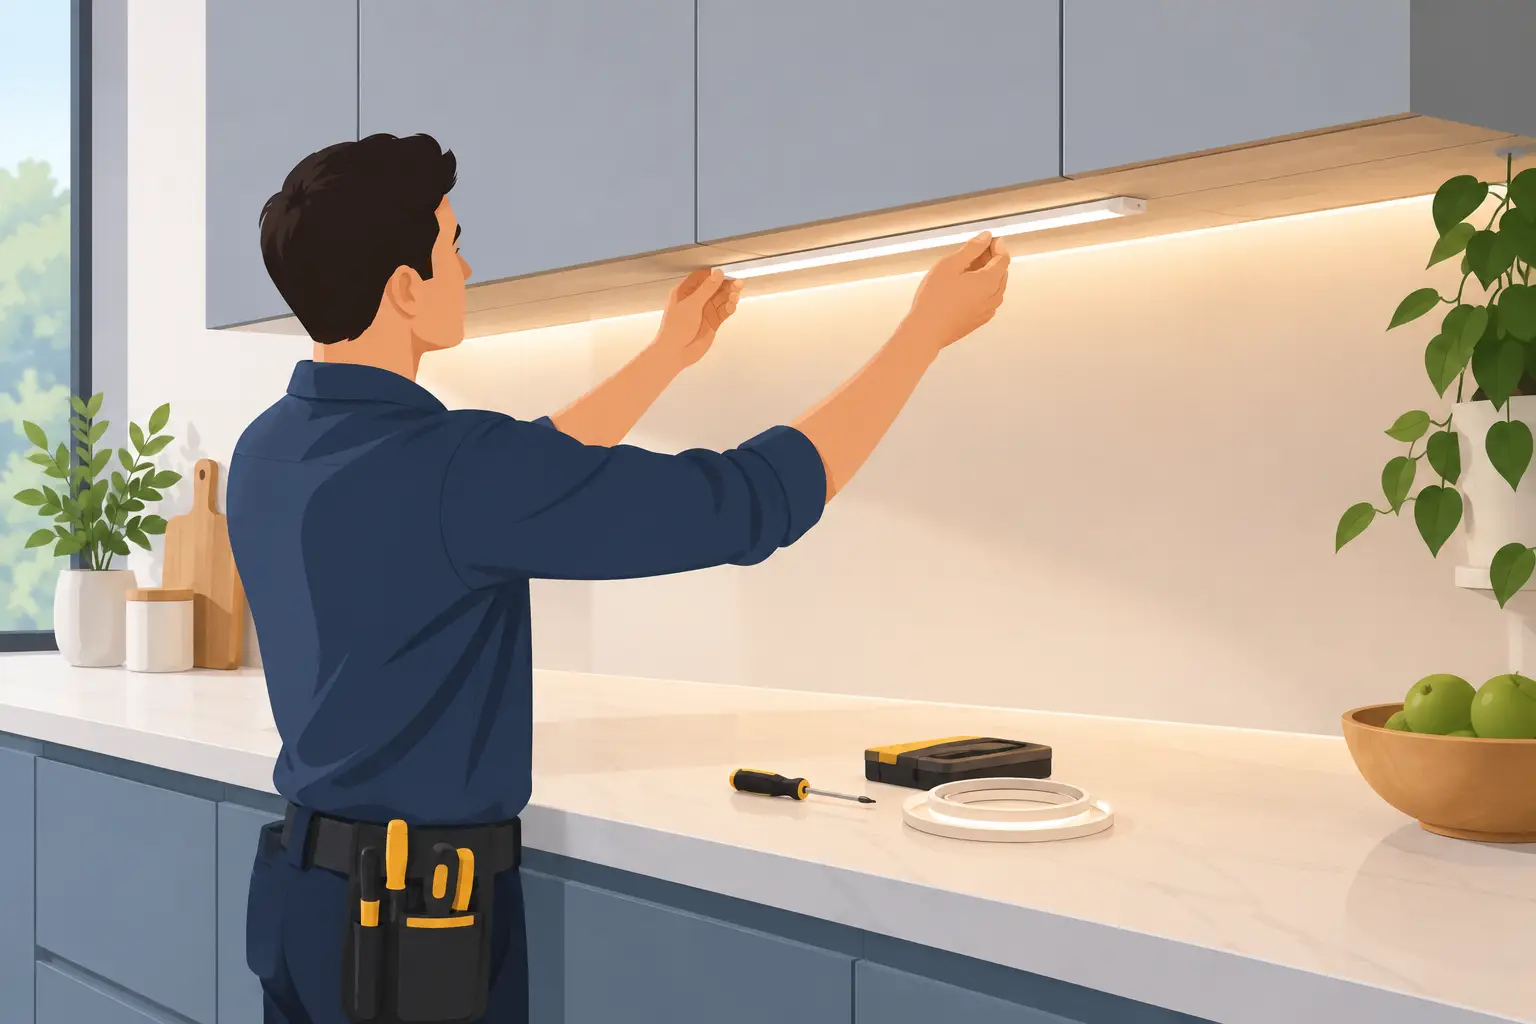
A beautiful kitchen can still feel unfinished when the countertop disappears into shadow. Installing under cabinet lighting changes that immediately, bringing focused illumination to food prep, late-night snacks, coffee corners, and the details that make a kitchen feel thoughtfully designed. It is one of the most effective upgrades for adding a high-end look without rebuilding the room.
The right lighting does more than brighten a work surface. It creates dimension beneath upper cabinets, draws attention to refined backsplash tile, and gives the room a warm, welcoming presence after the overhead lights are off. Whether you are refreshing a rental-friendly space or finishing a full kitchen update, the best approach depends on your cabinet construction, access to power, and the kind of finish you want to see every day.
Choose the Right Under Cabinet Lighting Style
Before measuring or mounting anything, decide how permanent you want the installation to be. Under cabinet lighting generally comes in three formats: puck lights, light bars, and LED strip lights. Each produces a different look and requires a different amount of planning.
Puck lights are compact round fixtures that create pools of light. They suit small prep zones, glass-front cabinets, and display shelves, although a single puck can leave darker gaps along a long counter. Light bars provide more even illumination and are an elegant choice for homeowners who prefer a clean, tailored appearance with fewer visible components.
LED strip lights are flexible, slim, and especially effective beneath long cabinet runs or around corners. A quality strip set in an aluminum channel with a diffuser can look remarkably polished. Without a channel, however, individual LED dots may reflect on glossy countertops or backsplash surfaces. That detail matters in a kitchen designed around elevated finishes.
For the light itself, LED is the clear practical choice. It uses little energy, runs cooler than older bulb styles, and can last for years. Look for a warm white color temperature around 2700K to 3000K if you want an inviting, residential feel. A 3500K option can feel crisp and clean for serious task lighting, while 4000K and above may appear too clinical beside warm wood, brass hardware, or creamy stone.
Brightness also deserves attention. For task lighting, aim for a fixture that provides enough output to illuminate the full counter rather than merely create a glow. Dimmable fixtures offer the most flexibility: bright for chopping and reading recipes, softer for entertaining or an early morning routine.
Plan Power Before Installing Under Cabinet Lighting
Power is the decision that separates a quick afternoon refresh from a more permanent home improvement project. Battery-operated fixtures are easy to place and work well where wiring is impossible, but they need regular charging or battery changes. They are best for occasional-use areas, not a busy kitchen where dependable daily light matters.
Plug-in lighting is a practical middle ground. The fixtures connect to a nearby outlet, and the cord can often be tucked beneath cabinets with clips or cable covers. This setup is ideal for renters and homeowners who want a clean result without opening walls. Measure carefully so the cord reaches the outlet without stretching across a backsplash or hanging near a sink.
Hardwired lighting delivers the most built-in look. It can connect to a wall switch, dimmer, or dedicated control system, leaving no visible cords. Because electrical work involves local code requirements and circuit safety, hire a qualified electrician if you need a new connection, switch, or junction box. A premium-looking kitchen should never come at the expense of safe installation.
Before choosing a fixture, inspect the underside of your cabinets. Locate any existing outlets, identify where cabinet frames create mounting surfaces, and check for obstructions such as trim, microwave vents, or under-cabinet shelves. If your cabinet bottoms are recessed, mount the light close to the front edge of the recess. This directs light toward the work area while keeping the fixture discreet from normal standing height.
Measure for a Tailored, Even Result
A little planning prevents the most common disappointment: bright spots, dark corners, and visible cords that distract from the room. Measure the length of every cabinet section separately, including breaks around the range, refrigerator, and corner cabinets. Do not assume one continuous strip will suit every section.
For light bars, choose lengths that cover most of the cabinet bottom while leaving a small margin at each end. For LED strips, mark the cut points specified by the manufacturer and test-fit before removing adhesive backing. Puck lights should be evenly spaced, usually 8 to 12 inches apart depending on their brightness and beam spread.
Keep fixtures away from the very back wall when possible. A light positioned too close to the backsplash can create a harsh line of brightness while leaving the front edge of the counter dim. Placing it near the front of the cabinet underside produces fuller coverage and keeps the source hidden.
Test the layout before committing. Use painter’s tape to hold bars or channels in position, then turn the lights on after dark. Check the reflection in glossy tile, stainless steel, and polished stone. This is the moment to adjust placement, brightness, or color temperature before screws, adhesive, and wiring make changes more involved.
Install With Clean Lines and Lasting Hold
Start by cleaning the cabinet underside with a gentle household cleaner, then let it dry completely. Grease and dust are common in kitchens, and they can weaken adhesive-backed strips over time. If you are mounting a channel, bar, or puck lights with screws, predrill small pilot holes to avoid splitting wood or laminate.
Adhesive LED strips are convenient, but use mounting clips for a more dependable finish, especially near a stove or dishwasher where heat and humidity can affect the adhesive. Aluminum channels are worth considering for visible areas. They protect the strip, soften the output with a diffuser, and create the kind of crisp line associated with custom cabinetry.
Route cords and connectors before securing the fixtures. Keep cables away from heat sources, sharp edges, and areas likely to be splashed. Use cable clips or paintable covers to guide cords along the underside of cabinets and down an inconspicuous side panel. Avoid pinching wires beneath trim or forcing connectors into tight bends.
If you are using a plug-in system, connect it to an outlet that is properly protected for kitchen use. Do not overload an outlet with multiple high-draw appliances. Lighting uses relatively little power, but the outlet may already serve a coffee maker, mixer, or other countertop essential.
Once everything is mounted, turn on the system and inspect it from several points in the room. Look for sagging strip sections, shadows at cabinet joins, visible light sources, and reflections that feel distracting. Small adjustments now make the final effect feel intentional rather than improvised.
Make Everyday Control Feel Effortless
The most beautiful lighting is also easy to use. A simple inline switch works for a plug-in bar, but a dimmer, touch sensor, remote, or motion sensor can make the upgrade feel more considered. Motion sensors are useful for midnight water runs, while a dimmer helps the kitchen shift from hardworking prep space to softly lit gathering place.
Smart controls can be worthwhile if you already use connected home devices, but they are not necessary for a refined result. A reliable, responsive system with warm dimmable light often feels more luxurious than a feature-packed setup that is awkward to operate. Choose controls that suit your habits, not just the product description.
A Small Upgrade With a Visible Return
Under cabinet lighting is especially valuable because it improves both function and atmosphere without demanding a major renovation budget. It can make older cabinets feel sharper, showcase a favorite backsplash, and give a compact kitchen a more spacious, layered look. For an especially elevated finish, pair the lighting with a decluttered countertop, a beautiful tray for daily essentials, and hardware that complements the room’s metal finishes.
At Arvenas, thoughtful home details are part of creating a space that feels as good as it looks. Choose lighting with the right warmth, placement, and control, then let it quietly transform the moments that happen around your kitchen counter every day.









Leave a comment